Upgrading Your Pool Pad with Smart Automation
September 19, 2026 · 7 min read
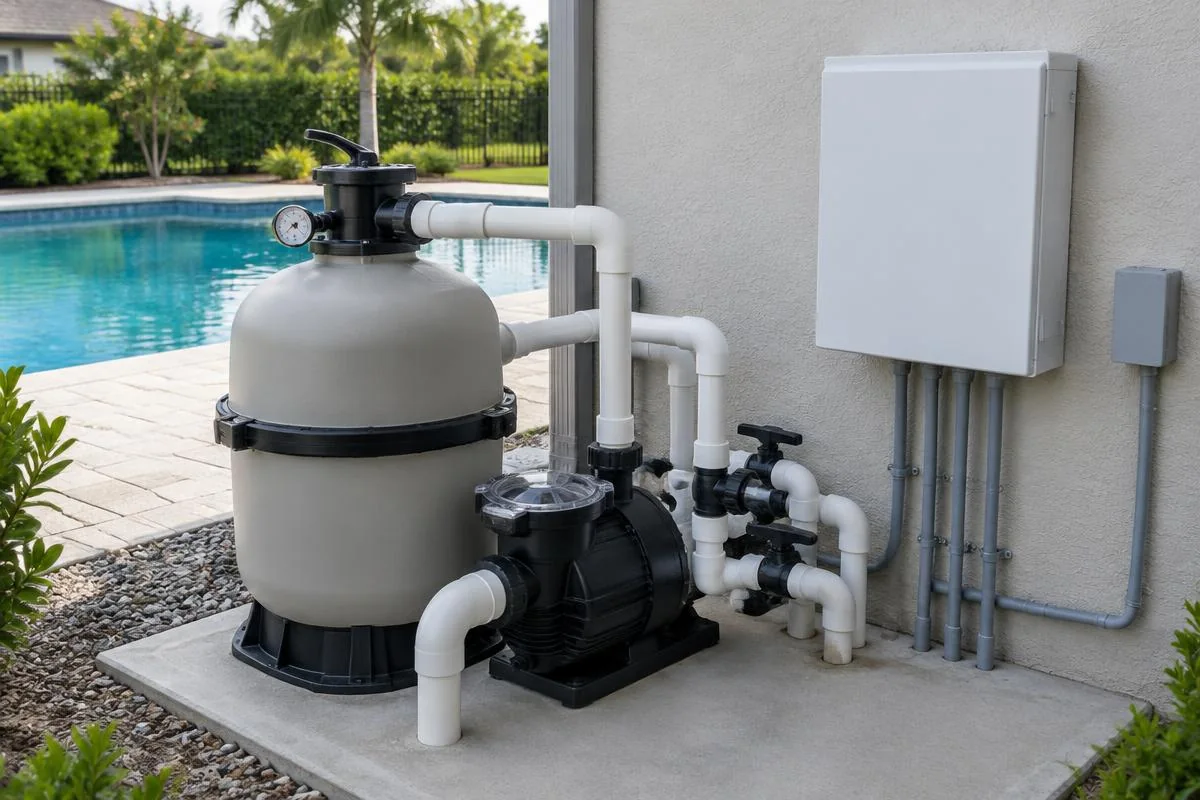
As temperatures drop in late September, managing daily pump cycles, heater setpoints, and freeze protection becomes an active chore. Manual mechanical time clocks with plastic tripper pins offer zero real-time feedback, waste electricity, and force you out to a dark equipment pad to verify run times. Upgrading to a digital automation hub consolidates every primary component on your equipment pad into a unified system controlled directly from your smartphone.
Modern automation panels do far more than run basic timers. They communicate directly with variable-speed pumps over RS-485 data lines, command modulated gas heaters or heat pumps, rotate motorized bypass valves, and toggle low-voltage landscape lighting. Retrofitting an older pad requires evaluating your subpanel electrical capacity, confirming equipment communication protocols, and securing a reliable outdoor data connection. Getting these mechanical and electrical steps right ensures smooth operation and protects your plumbing through freezing weather.
Evaluating Subpanel Capacity and Pad Space
Before purchasing an automation panel, assess your existing electrical subpanel. Most automation control centers require a 120V or 240V power supply to run internal electronics, along with dedicated breakers for every high-voltage auxiliary load like single-speed booster pumps, blowers, and line-voltage lighting transformers. If your current subpanel is a standard 50-amp or 60-amp box filled with twin breakers, you may need a load center model that combines circuit breaker slots directly inside the automation enclosure to keep wiring tidy and compliant with the National Electrical Code.
Physical clearance on the pad is another common hurdle during retrofits. Automation enclosures are typically rated NEMA 3R for rain resistance and measure roughly 18 to 24 inches wide by 20 to 30 inches tall. You must mount the panel at least 5 feet away from the inside wall of the pool unless separated by a solid fence or wall, and maintain a minimum of 3 feet of working clearance directly in front of the enclosure. Ensure your conduit runs leave sufficient wall space adjacent to existing filter tanks and heater exhaust vents.
- Verify existing subpanel feed wire gauge (typically 6 AWG copper for 60-amp service)
- Select an automation enclosure with an integrated breaker bank to consolidate panel footprint
- Maintain minimum 5-foot setback from the pool waterline per NEC 680 regulations
- Keep 36 inches of clear forward workspace in front of the electrical panel door
Selecting Relays and Cross-Brand Compatibility
Automation systems use high-voltage relays to cut or supply line voltage to equipment, paired with low-voltage communication ports for digital accessories. Base automation hubs typically ship with four 3-horsepower rated relays, which is sufficient for a standalone pool running a cleaner booster pump, an ultraviolet or ozone unit, and dual landscape lighting circuits. If you manage a pool and attached spa combination with dedicated water feature pumps, opt for an eight-relay board to avoid running out of control channels.
Variable-speed pumps and digital heaters require special attention regarding manufacturer ecosystems. While any smart panel can cut 240V power to a pump using a mechanical relay, doing so eliminates your pump's onboard drive logic and RPM efficiency. To command precise RPM settings for skimming, heating, and vacuuming, the automation panel must communicate through RS-485 serial data wiring. Pentair, Hayward, and Jandy each use proprietary communication languages; mixing a smart panel from one brand with a variable-speed pump from another often restricts you to basic relay control or requires an aftermarket digital bridge.
- Count all dedicated high-voltage loads to choose between 4-relay and 8-relay base panels
- Use shielded 22 AWG twisted-pair wiring for RS-485 digital communication runs
- Pair the automation brand to your variable-speed pump for full RPM control
- Reserve at least one auxiliary relay for future lighting or sanitation upgrades
Plumbing Motorized Actuators and Sensor Probes
Adding motorized valve actuators allows your automation panel to divert water automatically between pool mode, spa mode, and cleaning features. Actuators mount directly on top of compatible diverter valves (such as 2-way or 3-way valves from Jandy, Pentair, or Hayward) using four stainless steel machine screws into the valve casing. Low-voltage 24VAC wiring runs from each actuator back to the low-voltage raceway of the automation board, where internal toggle switches let you dial in the 180-degree physical travel stops.
Accurate thermal data is necessary for scheduling heaters and preventing winter line freezes. A standard retrofit requires two thermistors: a water temperature sensor and an ambient air temperature sensor. Drill a 5/16-inch hole in the PVC pipe between your pump discharge and the filter intake, insert the water sensor with its silicone O-ring, and secure it with a stainless steel hose clamp. Mount the ambient air sensor on the north-facing exterior of the automation enclosure, shielded from direct sunlight, to ensure your freeze-protection software reads accurate temperatures.
- Verify valve bodies have mounting bosses for standard 24VAC valve actuators
- Install the water temperature sensor before the heater to record true pool water baseline
- Position the ambient air sensor out of direct sunlight and away from hot heater exhaust
- Tighten sensor hose clamps to approximately 20 inch-pounds to prevent O-ring distortion
Establishing Reliable Outdoor Network Connectivity
A smart pad is only as useful as its network link, and pool equipment pads are notorious Wi-Fi dead zones. Thick concrete foundations, exterior brick or stucco with wire lath, and large metal heater jackets quickly degrade 2.4 GHz and 5 GHz wireless signals. Before mounting the system's antenna, use a network analyzer app on your phone at the exact pad location. You need a minimum signal strength of -65 dBm to maintain steady cloud connections without daily dropped packets.
If the Wi-Fi signal at the pad is weaker than -70 dBm, do not rely on standard indoor routers. The most reliable solution is running a direct-burial Cat6 Ethernet cable through rigid PVC conduit from your home router directly into the automation panel's network adapter. If trenching cable is impractical, install an outdoor-rated mesh Wi-Fi access point on the nearest exterior wall or eave line with direct line of sight to the equipment pad antenna.
- Aim for a pad signal strength between -50 dBm and -65 dBm for uninterrupted service
- Select automation models that support 2.4 GHz networks, which penetrate exterior walls better than 5 GHz
- Run direct-burial Cat6 in low-voltage electrical conduit where trenching is feasible
- Avoid placing antennas directly behind metal equipment cases or steel pool fences
Configuring Off-Season Logic and Freeze Protection
Once wiring and network testing are complete, the final step is programming operational schedules tailored to the transition into cooler weather. Autumn demands lower turnover rates than midsummer because swimmer loads vanish and algae growth slows dramatically once water drops below 60°F. Step your variable-speed pump down to low-speed skimming speeds (1,200 to 1,600 RPM) for 8 to 12 hours daily, which slashes electrical usage by up to 70% while keeping pool surfaces clear of falling leaves.
Freeze protection logic is critical for homeowners keeping their pools open into the late fall or year-round in moderate climates. Set the controller's freeze-protection threshold between 36°F and 38°F. When the ambient air probe hits that trigger, the automation system automatically overrides all off timers, fires up the main circulation pump at moderate speed, and rotates motorized valves between pool and spa positions every 15 minutes. This continuous flow prevents static water inside thin heater heat exchangers and above-ground PVC lines from freezing and rupturing.
- Drop primary filtration speed to 1,200-1,600 RPM once water temps remain under 60°F
- Set the automated freeze-protection trigger to 36°F to create a safety margin
- Program valve actuator cycles to alternate water flow through pool and spa lines every 15 minutes
- Enable mobile push alerts for freeze cycle activation, flow loss, and pump fault codes
Shop the parts mentioned
Ready to shop this category?
Thousands of products in stock — pay over time with Shop Pay on items over $50.
Shop equipment